
How to transfer the iTunes library to another computer? This is a question that people ask when they shifted from one computer to a new one and they need their iTunes library data on their new computer.
In this article, we will discuss how you can transfer your iTunes library from your old computer to a new one. We will give you a step-by-step guide, on how you can easily transfer the iTunes library from an old computer to a new one.
Read More: How To Transfer Data From Windows To Mac?
Moving the iTunes library from one computer to another computer is not an easy task, you need proper instructions for transferring it from one computer to another.
If you switched to a new computer and want to transfer your iTunes library from the old one to a new computer then don’t worry, you don’t have to lose your iTunes library data. You can easily recover it on your new computer.
iTunes is a popular media player which is now available for windows. It is mainly known for its large media library consisting of thousands of popular songs, movies, seasons, web series podcasts, tv shows, etc.
Read More: My Laptop Keeps Freezing & Not Responding?
As saving data in your hard drive can slow it down so you can transfer the whole data to a new computer.
Here are 5 best ways to transfer the iTunes library to another computer in Windows 10:
- Transfer iTunes library by copy and paste method.
- Restore the iTunes library on your computer with an XML file.
- Transfer iTunes library to a new computer using a flash drive.
- Transfer the iTunes library to a new computer using an iPhone.
- Transfer your iTunes library to your new computer using Copytrans software.
Let’s discuss these ways one by one.
Transfer iTunes Library By Copy & Paste Method:
To transfer the iTunes library by using the copy and paste method you have to take an external drive and then copy the songs on an external drive and then simply paste the copied files to your new computer.
This method is very easy for moving the iTunes library to another computer but it does not transfer the other information like genres or playlists.
We recommend this method only when you transfer music from other resources and want to create a new playlist on your windows pc.
Here are the steps for doing this:
- Plug in the external drive to your old computer and then find the folder you want to copy.
- Copy your desired songs, movies, etc to the external drive and plug it out from the computer.
- Then plug in the external drive to the new computer then paste the copied folder into your local device.
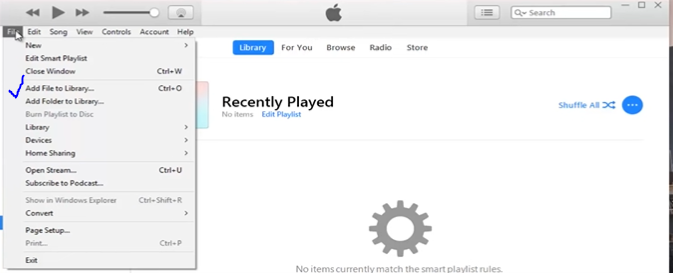
- After this, you have to open the iTunes library and on the left corner click on the “File”>> then click on “Add file to library” then find the folder on your local device that you copy and then import the folder to iTunes library.
See the attached image below:
Restore iTunes Library On Your Computer With XML File:
This is by far the fastest way to transfer your iTunes library to another computer within a few clicks.
All you have to do is just generate a .xml which is probably a few KB or a few MB and then paste it on the new computer.
You can do this only when you have purchased all your music from the iTunes library.
Let’s do this step by step:
- First, you have to open iTunes on your old computer.
- Then click on File >> Library >> Export Playlist.
- Then you have to copy that file on your external device and paste it into your new pc.
Then open the iTunes library on your new computer and click on File >> Library >> Import Playlist and open the .XML file.
Transfer iTunes Library To New Computer Using An iPhone:
In this tutorial, we will show you how to transfer your iTunes library to a new computer with an iPhone.
The first thing you need is a computer and an iPhone. If you have both of these things, then the rest is easy!
On the old computer:
1. Open iTunes on the old computer and select “File > Library > Export Library…”
2. Select “Create option-click playlists” and click “OK”. The default location for your new library is your music folder, but if you’re not sure where that is, just select “Choose…” from the list and navigate to it manually. Create a new folder named “iTunes Music” inside of it if there isn’t already one present.
3. Click on “Advanced Options…” and uncheck all of the boxes except for “Check for missing files” (make sure this one is checked). Click OK again then click Save when done.
Transfer iTunes Library To New Computer Using Flash Drive:
This is another easy way of moving the iTunes library from an old computer to a new one. Let’s follow the steps below to transfer the iTunes library to your new computer.
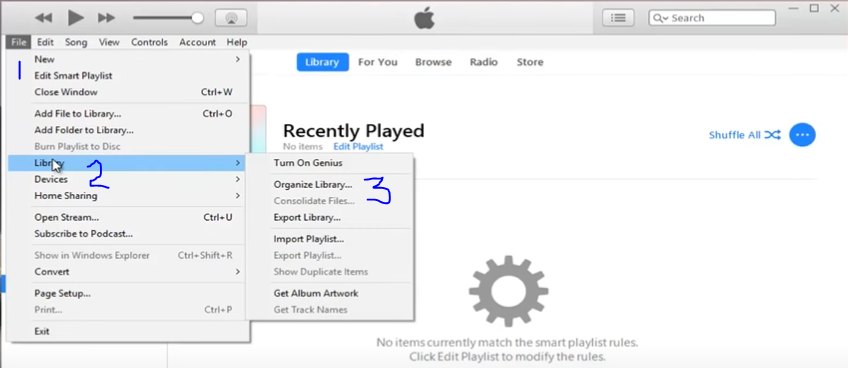
- Open the iTunes app on your old computer and click on File >> Library >> Organize Library.
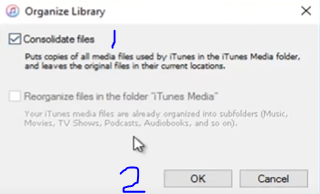
- When you click on the Organize Library, a dialogue box will open, check the “Consolidate Files” checkbox and click on “OK” to continue.
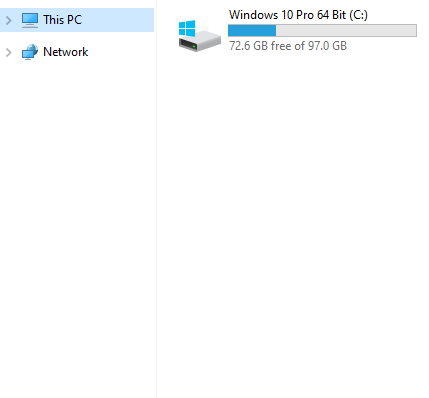
- Now you have to open the file explorer from the windows taskbar and click on the PC, and then C Drive.
Then go to the iTunes folder step by step:
- Double click on Users.
- Double click on your user account (in my case I clicked on “one”).
- After this click on Music.
- Then you will reach the iTunes folder.

- Then left-click on the iTunes folder and click on the “copy” from the menu.
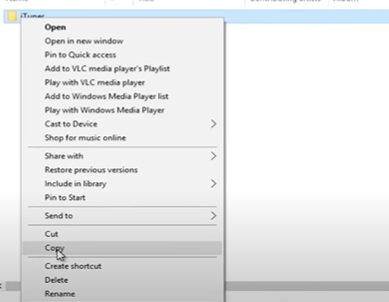
- Now, paste this file into your USB drive and then connect the USB drive to your new computer and paste the iTunes folder that you copy into the computer.

- Now, open the file explorer on the new pc and go to the iTunes folder by using the above-mentioned method.
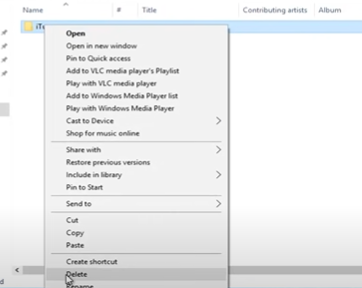
- You will see the iTunes folder on your new pc as well, if you don’t want to overwrite the content then it’s better for you to delete that folder.
- Right-click on the iTunes folder and click on the delete option.
- After this, select the iTunes folder (that you copy from the old computer) and paste it into the music folder.

Congratulations, you are all set, you have successfully transferred the iTunes library from the old computer to the new one.
Transfer iTunes Library To Another Computer Using Copytrans Software:
Now let’s discuss the 4th method of moving the iTunes library to another computer.
In this method we will use third-party software for moving the iTunes library, the software is called CopyTarns TuneSwift.
Copytrans Tuneswift is software that completely automates the process of transferring the iTunes library from an old computer to a new one. It will copy the exact iTunes library as it’s on the old computer.
By using Copytrans Tuneswift you don’t have to worry about your music, videos, etc, it will find everything and transfer it to the new computer.
This software is really amazing for moving the iTunes library.
Now follow the steps mentioned below to copy the iTunes library:
Download Copytrans Tuneswift Software on your computer.
- Run the Copytrans program on your old computer, you will see the three options i.e “Transfer”, “Backup” and “Restore”.
- Click on the “Transfer” option.
- After clicking on the “Transfer” option now you will see the two options i.e “Windows PC” and “Mac OS”.
- Click on the “Windows PC”.
- After this, you will see the three options in the dialogue box, i.e, “New Computer”, “External Hard Drive” and “New folder/drive on this computer”.
- Click on the “New Computer”.
- If you choose any other option than “New Computer” then your library will be copied not transferred.
- Then select the folder by clicking on the browse button and save the iTunes library (it is highly recommended that you save the iTunes backup to the external device so that you can restore it easily on Windows PC) and click on the “Start Transfer” button.
- When you press the “Start Transfer” button the process will be started and it takes some time according to the library size.
- When the backup will be complete, disconnect your external drive and plug in that drive to your new Windows PC.
Till now, you have saved the backup of the iTunes library into your external drive, now you have to restore the iTunes library on your new Windows computer.
Follow these steps to restore the library on your new computer:
- Download and install Copytrans Tuneswift software on your Windows 10 PC.
- In the next step, you have to select the folder where your iTunes backup is and then select the iTunesBackup.tsw file, and then click on the “Start Restore” button.
- After pressing the “Start Restore” button the process will start, it will take some time and your iTunes library will be transferred successfully on your Windows PC.
Bottom Line of Transferring iTunes Library To New Computer:
In this article, we have solved the problem of “how to transfer iTunes library to another computer” easily. We have mentioned the 5 best and easy ways to transfer your iTunes library to a new computer.
By far the easiest and less time taking method is by using the XML File method and Copytrans Software method. It entirely depends on you which one you are going to use to transfer the iTunes library to your new pc.
After reading this in-depth article we hoped that you will be able to transfer your iTunes library to a new pc without any loss. You can comment below if you face any problems regarding transferring the iTunes library to your new computer Windows 10. We will answer it as soon as possible.